 Information
 Software
 Download
 Install
Instructions
The easiest way to obtain a valid license file is to download the iTools self-installing program for the operating system of your choice. You need only to get the correct ".exe" file for your machine. Just download and make the"*.exe" file executable by executing chmod. Below, we will go step-by-step through the process of obtaining a license file for iTools.
Example Install:
- chmod +x tw.dbin.SunOS5.2.0.0.exe
- ./tw.dbin.SunOS5.2.0.0.exe or
- chmod +x ic.dbin.SunOS5.2.0.0.exe
- ./ic.dbin.SunOS5.2.0.0.exe for versions created during the InternetCAD.com period.
**Linux installation problems help**
Welcome the the iTools/TimberWolf Install program!
This is the self-extracting iTools installation and setup program. Because of security reasons, this program will *NOT* run under the root account.
Checking account...bill
Checking home directory.../home/itools
You must read and accept the End User License Agreement to continue. Press return to display it: (You need to hit carriage return here).
TimberWolf Systems, Inc. Electronic End User License Agreement
Notice to User: This End User License Agreement (EULA) is a CONTRACT between you (either an individual or a single entity) and InternetCad.com, Inc.
.
.
.
Do you accept the terms? (yes/no) : (You need to enter yes here).
If you need to install binaries for more than one operating system,
you should exit this program, download the additional binaries (files
of the form: ic.[d]bin.
http://www.twolf.com/pub/releases/v1.
and the latest binaries may be found at
http://www.twolf.com/cgi-bin/beta.
Current directory is /home/itools
iTools root directory (ICDIR) will be:
/home/itools.1.4.0
iTools can only be installed in the current directory. Do you wish to install iTools in the current directory? (default yes) (You should hit return here).
Verifying self-extracting archive...ok.
OS:SunOS5 archive size:8427613 install size:90380 gzip size:45309
./itools.1.4.0/
.
.
../itools.1.4.0/lib/FreeBSD
[install]:wrote 8427613 bytes total
In order to execute iTools, the user must first set the iTools
environment variables ICDIR, ICOS, and LD_LIBRARY_PATH (SHLIB_PATH on
HP Unix). In addition, the user must set up appropriate links if
the Netscape plugin is to work correctly. ICDIR is the pathname of the
iTools root directory. ICOS is the name of the operating system. The
name of the operating system can be determined by executing the icuname
command in the ./itools.xxx/bin directory. LD_LIBRARY_PATH describes
the search path for dynamically linked libraries. All of these variables
and the Netscape plugin setup can be set to the appropriate values by
typing 'source .icrc
. ./.icrc .sh
or
. ./.icrc .ksh
respectively.
Note:
Do you wish to continue the installation and source the iTools initialization file? (default yes) (You should hit return here).
   Initializing the iTools environment variables...
   ICDIR has been set to /home/itools.1.4.0
   ICOS has been set to SunOS5
   DISPLAY has been set to :0
   LD_LIBRARY_PATH has been set to:
     /home/itools.1.4.0/lib/SunOS5:
   The search path now includes:

     /home/itools.1.4.0/bin
   and
     /home/itools.1.4.0/bin/SunOS5

   Netscape plugin enabled for SunOS5.
Do you wish to run the graphical interface instead of the non-graphical command line interface? The default is to execute graphical interface. To run the command line interface type no. (default yes) (You should hit return here unless you do not have a working X server.)
Entering Graphical Mode
Now the installation program should enter a graphical mode and you should see the following window on the screen.
Click on the Next button with the mouse cursor to continue the installation process.
You will now see the following window on the screen.
Click on the NO button and then click the Next button to continue the installation process.
You will now see the following window on the screen.
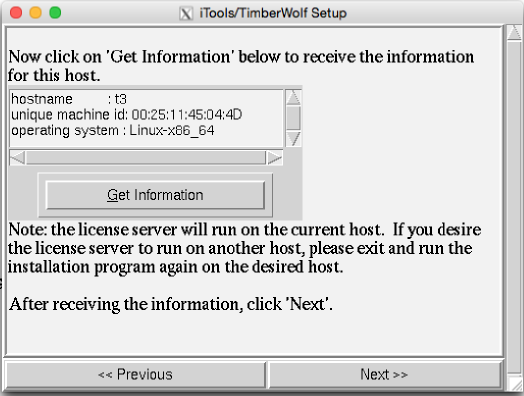
Click on the Get Information button to gather information about your machine and then click the Next button to continue the installation process.
You will now see a window similar to the following:
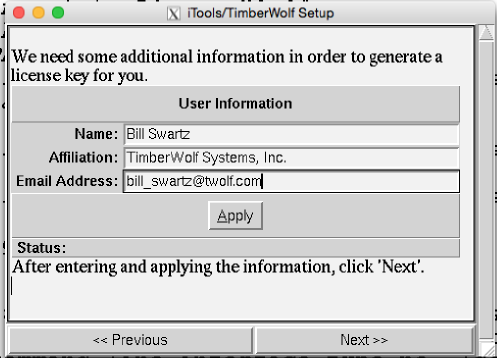
Fill out the form with your name, affiliation, and email address. The email address is where we will send the license file. After entering the data click the Next button.
You will now see a window similar to
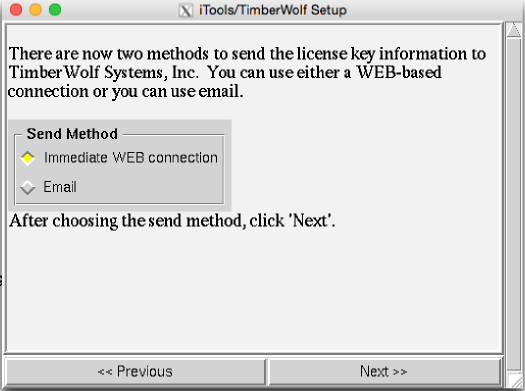
You have the option of sending the data by email or by Web connection. Here we will use the Web method.
You will be presented with a window similar to the following:
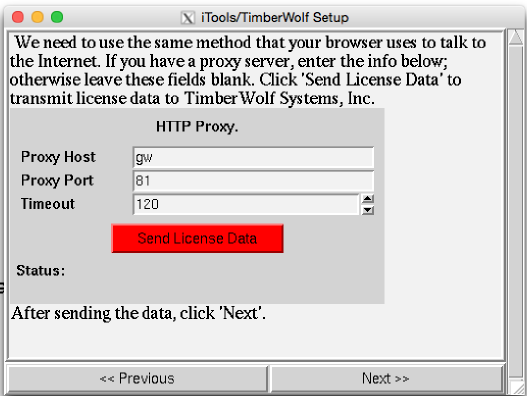
If you are directly connected to the Internet, you only need to click the green Send License Data button. Otherwise, if you are behind a firewall, you will need to furnish the proxy settings used by your Web browser. You will need to furnish both the host and port of the proxy. After sending the data to TimberWolf Systems, Inc. automatically, you should get immediate feedback on whether the registration was a success as shown in figure. Then click the Next button to continue the installation process.
Next, you will now see the following window on the screen.
Choose the appropriate Lease Type and click the Next button to continue the installation process.
You will now see the following window on the screen.
Choose the appropriate Lease Format, print it out, sign it, and fax it back TimberWolf Systems, Inc. Then click the Next button to continue the installation process.
| You may also click here to download the appropriate lease documentation. |
You will now see the following window on the screen.
You may click on Run EZ to learn more about Itools while you are waiting for your license file. Click on the Next button to continue the installation process.
You will now see the following window on the screen.
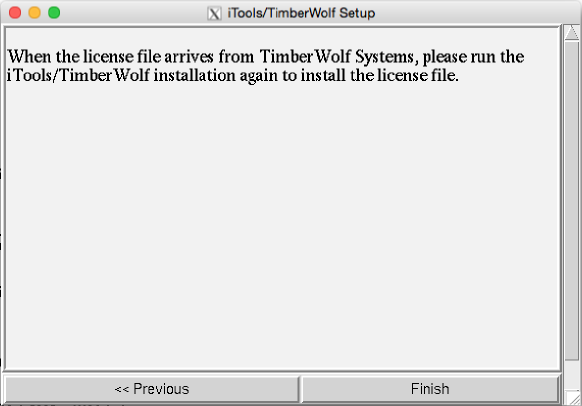
Click on the Finish button with the mouse cursor to conclude the installation process.
When your license file arrives run the Itools installation process once again.